Ec2MarkdownToHtml
Overview
The goal of the EC2 Markdown to Html assignment is set up MakeHtml on our EC2 instances, and to learn a bit about:
- Working with bitmaps.
- Working CSS
- Viewing your pages on a mobile device
Part of the midterm will be to create a web site on EC2 using our Markdown to HTML technology. You will be able asked to choose a theme for your website, and the content that should appear on it.

When doing this assignment, you might consider focusing on some subject that you would like to explore on the midterm. For instance, if you want your midterm website to be about the Mars rover missions, then you might want to consider choosing bitmaps about that subject while working on this assignment. I mention this only as a heads up, there is no requirement, nor am I expecting, that you have a complete theme in this assignment. Nor am I asking you to pick any particular type of bitmap to display. I simply want to let you know where we are headed, so you can make informed choices.
You can and should pick a topic that interests you. If no idea comes to mind, then possible topics include:
- A resume
- Favorite Music
- Favorite Books
- Favorite Movies
- Hobbies
- Interests
Don’t try to polish or make your site fancy at this stage. Just try to get it working. Even if you just set up a few pages with little text on them, but a heading, an introductory sentence, and one picture, that would be enough.
Run MakeHtml
MakeHtml and the code in JsObjects is frequently updated. On Pristine Lubuntu, copy over the new version.
Begin the process by updating JsObjects:
jon
git pull
cd MakeHtml
Run the script called renewMakeHtml:
./renewMakeHtml
Copy in the new version and run it to be sure it works:
See this code in the config folder:
{
  "calvert": {
    "base-dir": "/home/bcuser/",
    "site-dirs": [
      "Documents/AllTest",
      "Documents/AllSite"
    ],
    "destination-dirs": [
      "/var/www/html/",
      "/home/bcuser/temp/test-site/"
    ]
  }
}
You can use this file to specify where to copy markdown files from, and where to copy HTML to. By default, the first item in each list will be used.
NOTE: Though on most systems it should work out of the box, you may need to modify this file, and particularly the base-dir to fit your system.
Getting Started
While still on Pristine Lubuntu, follow the instructions in the Lamp Markdown assignment and create a site that you like on the Pristine Lubuntu Apache server. Copy your markdown files to your Git repository. Push them.
On EC2, pull your repository. Copy your files back out to a directory called Documents/AllTest:
mkdir ~/Documents
mkdir ~/Documents
cp -r AllTest ~/Documents/.
Don’t forget to set up permissions on /var/www/html:
sudo chown -R ubuntu:ubuntu /var/www/html/
Set up the MakeHtml program on EC2 and – if possible – on local Ubuntu Server running in a VM. Run it. Access your website using your Elastic IP or the IP address of your Ubuntu Server. Repeat the process of developing your site on Pristine Lubuntu, pushing it to your repository, and then pulling on EC2.
NOTE: The point here is that an EC2 server instance does not make a good development machine. Do your development on Pristine Lubuntu, then use Git to transfer your files EC2, and to ultimately display the result in your web site.
NOTE: Some of you may be interested in setting up a domain name, rather than using a raw IP address. We will very likely do that, but later in the course.
Git Repository
If you move to a new server, such as EC2, and want to set up your repository, you can usually get a copy of it with git clone.
I prefer that you first copy over your private key to your ~/.ssh folder and then load it with ssh-add or by setting up sshadd.
Once your key is loaded, just clone your repo:
git clone git@github.com:<username>/prog270-lastname-2016-fall.git
You can get the exact URI from GitHub/BitBucket. If you do things that way, you should not see the issue you circle above in red. Especially while you are setting it up, you can always just delete or rename a corrupted or poorly configured repo and start again:
cd ~/Git
rm -rf prog270-lastname-2017
git clone  git@github.com:<username>/prog270-lastname-2017.git
Another issue can come up of we forget these commands:
http://www.ccalvert.net/books/CloudNotes/Assignments/GitNewRepo.html#configure
SSH Setup
Students often need a reminder on how to set up SSH on EC2:
- The ~/.ssh/authorized_keys file contains your public key.
- When you created a your Ubuntu Server on AWS, you downloaded a private key with PEM extension. AWS automatically put the public key for that PEM file in your EC2 authorized_keys file.
- But you might want to copy the public key that you uploaded to Git to the same file as it will save you a step when you want to SSH to EC2.
- Details are here: http://www.ccalvert.net/books/CloudNotes/Assignments/Ec2GetStarted.html#step-five
- The ~/.ssh directory should contain a copy of your private key for GitHub.
- Step five of Ec2GetStarted.html provides strong hints on how to copy your private key to EC2.
- Once you have it on your EC2 instance, load it with ssh-add or sshadd.
Important Reminder
Don’t forget the scripts that you can find here:
Frankly, it is best if you understand how to copy the files by hand, and then start using the scripts. The deeper your understanding the better. But there is no doubt that in the long run these scripts are useful and help to automate a potentially error prone and time consuming task.
When you are trying to move your web site from your local machine to EC2, these scripts can be very useful.
Bitmaps
Go into and create three documents on any subject you like. Include at least one picture in each document. The pictures can come from anywhere. They need not be pictures you create. To help you get started, you can use the image icon at the top of Atom. Just paste in the URL of your picture. As a rule, you want to select smaller images so that they do not take up to much space on your page, but we will talk some about changing the size of a picture in the next section.
You can search for the images on the Wiki Media Commons. These images are free to use and usually come without complex copyright issues.
NOTE: It is important that you don’t take images from sites at random. Many images on the web are copyrighted and require payment before they can be used on your site. We are constructing a public site, and we don’t want to bring the “long arm of the law” down on you or Bellevue College.
When looking on WikiMedia, there are two approaches. First, try one of these searches:
Alternatively, go to the main page and use the search box on the top right. For instance, search on Mountains.
Once you see an image you like:
- Click on it.
- Choose More Details at bottom right.
- Right lick on image sizes beneath the picture, choosing one that is approximately 640X480.
- Choose Copy Location, Copy Link Address or some similar option.
- Click on the Image icon at the top of StackEdit and paste in the URL of your image.
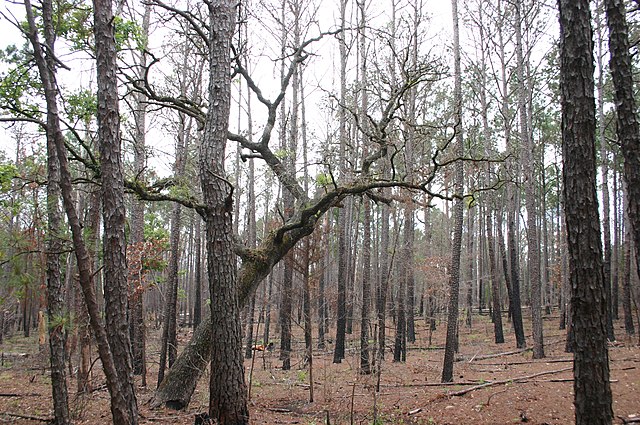
Example results:

When working with bitmaps, see also:
CSS
As you already know, you can enter bang, square brackets and a title, then parenthesis and a URL to display a picture with markdown. A bit like this, where you text is flush left:

The above code yields a picture with a default size:
If you want to get more control over the picture, you can use CSS. This usually involves writing real HTML in your markdown, and including a class. Here is my simple CSS class:
img.twenty-five-percent {
   width: 25%;
}
You should put the CSS in /var/www/html/css/style.css.
And here is the HTML code for using this new CSS class:
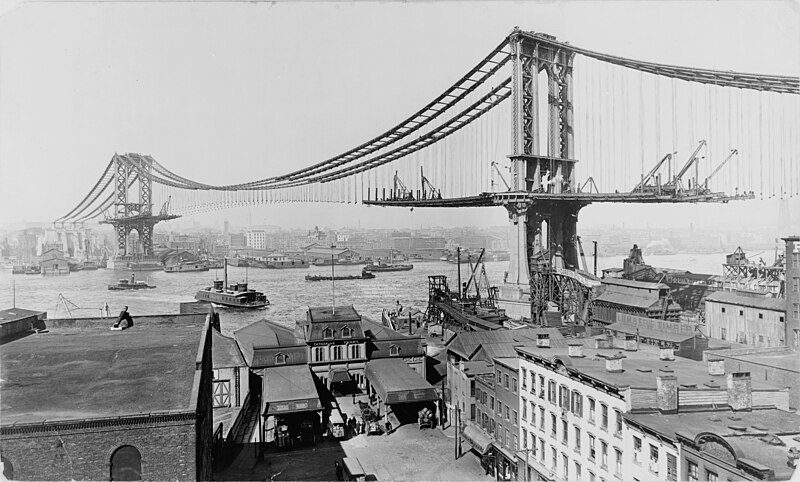
<img class="twenty-five-percent" src="https://foo.com/my-picture.jpg" alt="bridge">
You can paste the line with the HTML IMG tag in it directly into your markdown file while using Remarkable. Markdown supports both markdown itself, and HTML. When using markdown, you can just switch to HTML as needed:
## Some Header

Some markdown text. You can mix HTML and markdown in the same file.

<img class="twenty-five-percent" src="https://foo.com/my-picture.jpg" alt="bridge">
For all this to work, make sure you are using the most recent version of MakeHtml, as explained near the top of the file. In particular, the new version of MakeHtml includes code that loads style.css.
Turn it in
Make sure both MakeHtml and your website are working. Set them up on:
- your local Pristine Lubuntu VM
- our VirtualBox hosted Ubuntu server
- and on EC2.
Provide a link to your EC2 web site so that I can view it. It should look something like this:
http://XX.XX.XX.XX/master-list.html
Here XX.XX.XX.XX is your elastic IP address, and master-list.html is some valid page on your site that links to your other pages either directly or indirectly.
When you submit the assignment, include at least two screen shots:
- One of your web site displaying a page that contains a bitmap. In other words, open a browser, navigate to your website, navigate to a page that contains a picture, take a screenshot, and turn in that screen shot.
- Also include a screenshot of the output generated from running the MakeHtml program at the EC2 ubuntu command prompt.
Activities
Here is a drawing that might help some of you visualize what we are doing in this assignment:

Workflow
Here is the typical workflow when setting up the web site on EC2:

Hint
Check ~/Source/MakeHtml/config/ElvenConfig.json to make sure it is compatible with your system. In particular, check the “base-dir”, which assumes that your home path is /home/bcuser.
{
  "calvert": {
    "base-dir": "/home/bcuser/",
    "site-dirs": [
      "Documents/AllTest",
      "Documents/AllSite"
    ],
    "destination-dirs": [
      "/var/www/html/",
      "/home/bcuser/temp/test-site/"
    ]
  }
}
renewMakeHtml
In the root of the MakeHtml is a program called renewmakeHtml. You can copy this program in the ~/Source directory.
Whenever we run renewMakeHtml from the ~/Source directory, it will copy a new version of MakeHtml into a directory called Source/MakeHtml. First it deletes any existing ~/Source/MakeHtml directory, then it copies in an updated version of the program. This will overwrite our changes to ElvenConfig.json. We therefore should:
- Just use MakeHtml unless Charlie says there is an update, or you learn that there is an update.
- To run MakeHtml do this: cd ~/Source/MakeHtml and then npm start
- If you there is an update, then run renewMakeHtml from the ~/Source directory
- The renewMakeHtml script automatically runs npm install.
- We need to run npm install only once. We run npm start every time we want to start/run the program.
- After running renewMakeHtml navigate (cd MakeHtml) into the MakeHtml directory and edit config/ElvenConfig.json as appropriate: nano config/ElvenConfig.json
- Now run MakeHtml as shown above.
When on pristine Lubuntu ElvenConfig should look like this:
{
  "calvert": {
    "base-dir": "/home/bcuser/",
    "site-dirs": [
      "Documents/AllTest",
      "Documents/AllSite"
    ],
    "destination-dirs": [
      "/var/www/html/",
      "/home/bcuser/temp/test-site/"
    ]
  }
}
When on EC2, ElvenConfig should look like this:
{
  "calvert": {
    "base-dir": "/home/ubuntu/",
    "site-dirs": [
      "Documents/AllTest",
      "Documents/AllSite"
    ],
    "destination-dirs": [
      "/var/www/html/",
      "/home/ubuntu/temp/test-site/"
    ]
  }
}
Rhythm
When working, perhaps you want to do something like this:
- Make some edits in Atom
- Run MakeHtml to copy edits to /var/www/html
- View the results at http://localhost. If all is well:
- Run CopyAllTestAndApacheToRepository
- Push
- Switch to Ec2
- Pull
- Run CopyFromRepoToAllTestAndApache
- Run MakeHtml on EC2
- View the results at your Elastic IP
The one catch is that before the first step you might need to set things up so that MakeHtml copies sends files ~/Documents/AllTest to /var/www/html and not to ~/Source/firebase-data/public. This involves either editing config/ElvenConfig.json or copying in a pre-configured one as Triet suggests. But once that step is done, then you can follow the pattern shown above.
Random Tip
Here is how to change all instances of bcuser to ubuntu inside the ElvenConfig.json file:
sed -i "s/bcuser/ubuntu/g" ElvenConfig.json